For basic, yet proper chainsaw sharpening, use a chainsaw filing kit. Read your chainsaw’s owner’s manual to determine the size of your chain. Each filing kit contains files that correspond to a specific chain size.
Most cutting apparatus documenting units incorporate a:
§ Round record for honing the bent regions of the cutting teeth.
§ Flat record for honing the profundity measures.
§ Filing manual for guarantee the round document hones at the correct points.
§ Depth check apparatus to set the tallness of the profundity measures to be recorded.
Some recording units give a documenting guide/profundity check blend apparatus.
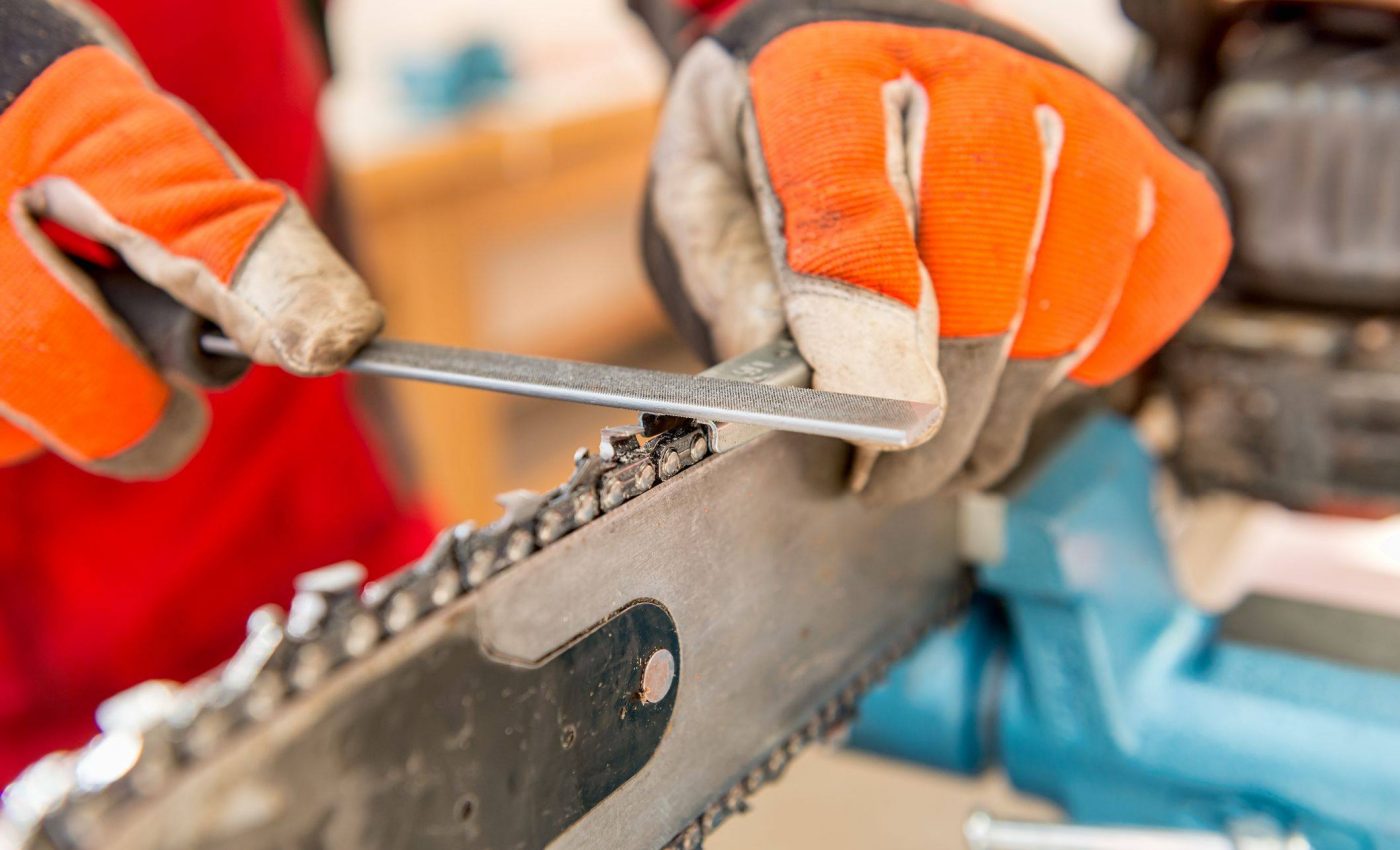
Using a vice is recommended to hold the chainsaw in place when you are sharpening.
Step-By-Step Chainsaw Sharpening:
1. On the off chance that your cutting tool’s chain isn’t perfect, clean it. This makes honing more straightforward and increasingly exact.
2. Slap the cutting tool in a bad habit. Ensure the chain is tensioned and cinch the bar between a bad habit or any device that will hold it emphatically set up.
3. Turn the chain to find the primary shaper (the briefest shaper on the chain). Beginning with the briefest shaper permits you to decide the amount to document the remainder of the cutters, so all the teeth are about a similar length.
4. Lock the chain brake, which keeps the chain from moving while applying the recording strokes.
5. Remaining on one side of the chain, you will see cutters that face you to within and cutters that meet away from you. Record within confronting cutters first. Each and every other cutting tooth is inside-confronting. You will get to different cutters when you move to the contrary side or turn the saw around.
6. There are three edges to consider when recording every shaper: the top plate, side plate, and the cutting edge. Your record guide will have markings that assist you with coordinating the right slicing-edge to the surfaces with the round document.
7. Utilizing two hands, place the record and document directly on the shaper and use smooth even strokes, driving ceaselessly from your body. Just record in that one bearing, inside to out. Hone every shaper by turning the bar until you’ve documented all within confronting cutters. At that point, flip the bar around and hone the rest of the cutters you skirted.
8. Since the cutters are done, how about we hone the profundity checks. Profundity checks are the bent snare formed piece of the cutting teeth. The profundity measure decides the size of the wood lump that is cut by the shaper. Utilize the level document with the profundity measure manual for grind down the profundity check to the right stature, ensuring it’s somewhat shorter than the tallness of the cutters.
9. Twofold watch that you’ve honed every shaper and profundity check. You should see a clean meager chrome edge on the cutting teeth.
10. Last, however not least, re-pressure the chain to its appropriate working strain.
There you have it, ten stages to a more keen, more secure cutting apparatus. At the point when the chain cutters are worn to about 4mm long, it’s an ideal opportunity to get a substitution chain. Over-worn cutters have the danger of severing while at the same time working.
Conclusion & Thoughts-
Even if you’re an exact person, this sharpening process can be done in under 30 minutes. Remember to check your chainsaw’s owner’s manual for all sizes, measurements, and angles for your chain. You may also contact the manufacturer or a local dealer.