The Process
You’re finally ready to get an AC that will keep your house cool for the impending summer heat. While putting an AC unit in a window isn’t particularly difficult, there are a few things to consider before you buy that expensive unit. Not all ACs are made the same, and what works well for one house or climate may not have the results you are looking for.
Read on to learn more about how you can be prepared for summer while ensuring you’re getting the quality you need in an AC.
Where Do You Put an AC in the Window?
Where you put an AC in a window can affect the airflow in your house. Hot air rises while cool air sinks, so make sure the window you choose is not on the ground floor or basement if you live in a hot climate. Try to find a central window/area in your home to make sure the air is more evenly distributed throughout your living space. Make sure the window you plan to use is close to an electrical outlet.
Before installing your AC, it’s a great idea to see exactly where the flow of your air circulates through your home. Place a fan in the window where you plan to install your unit and take note of where the air is going throughout your home. Is one room getting too much air? Too little?
It’s possible to reroute the airflow if needed. You can close the doors of rooms you’re not using or strategically place fans to blow the air in the right direction.
Your Health and Safety
Did you know that carbon monoxide can be released from certain appliances? This colorless, odorless gas is incredibly deadly and needs to be avoided within a home at all costs. This is also why it’s important to make sure you have your AC unit properly installed in your home.
How you put in an AC through the window can affect how carbon monoxide is vented out of your home. One solution is to check with a contractor or HVAC technician. They are trained to analyze and find the best spot to put in an AC unit based on your needs and specifications and on safety.
Is Your AC Efficient?
AC technology has improved substantially in recent years. Units have become more powerful as well as cost-effective and environmentally friendly. Experts recommend that you investigate getting a new unit if your home is still using a unit from 10 years ago. Look for units that have an Energy Star rating to maximize the heating and cooling of your home.
What Is the Energy Star System?
You’ve probably seen commercials for getting the highest-rated Energy Star appliances, from refrigerators and freezers to AC systems. But what does it mean? And is it worth the cost in the short and long terms?
According to their website, Energy Star is a government-backed and unbiased symbol for energy efficiency. If the unit you are looking at has this symbol, it means it was evaluated and approved by an official source: the US EPA. The EPA individually certifies and approves every product with an Energy Star label, so there’s no question about the quality of your AC.
Energy Star Products: How Much Do They Save?
Here’s the big question: how much do Energy Star products actually save the consumer? According to Energy Star, they and their partners have saved American homes and businesses 5 trillion kilowatt-hours of electricity since 1992. That’s a savings of $450 billion in energy costs!
That’s an incredible amount of money. Because Energy Star–rated ACs are more efficient than other AC brands, they will cut your energy use down and save you money on your energy bill. Energy Star units also create less waste for the environment, meaning you’re helping the earth just by switching to a more effective AC.
Next Steps
You’ve looked at the best Energy Star models and picked your AC, and now you’re ready to have it installed. Congratulations! Now, there are a few things to keep in mind as you begin the process of installing your AC.
Proper Ventilation Is a Must
Without proper ventilation, harmful mold, mildew, and other bacteria can build up in your home and impact your air quality. When you’ve chosen your window for installation, make sure the outside is clear of any overhanging tree branches or any other structures that might block your air conditioner.
Make Sure You Have the Proper Tools
A basic tool kit will be required for installation. In particular, make sure you have solid screws and a drill to secure the AC in the window. Assemble all your tools before you start to work because, once you’ve hoisted the AC unit into the air, your hands are going to be full for a while.
Assemble and Install
If you’re purchasing a new unit, first measure your window space so you don’t choose a unit that won’t fit. Then carefully remove the AC from its packaging. Make sure to follow any safety and assembly instructions. Remove the screen from your window if it has one.
Next, grab a buddy to help you with the installation. It’ll be easier to handle the weight of the unit, and it’s important to have an extra set of hands.
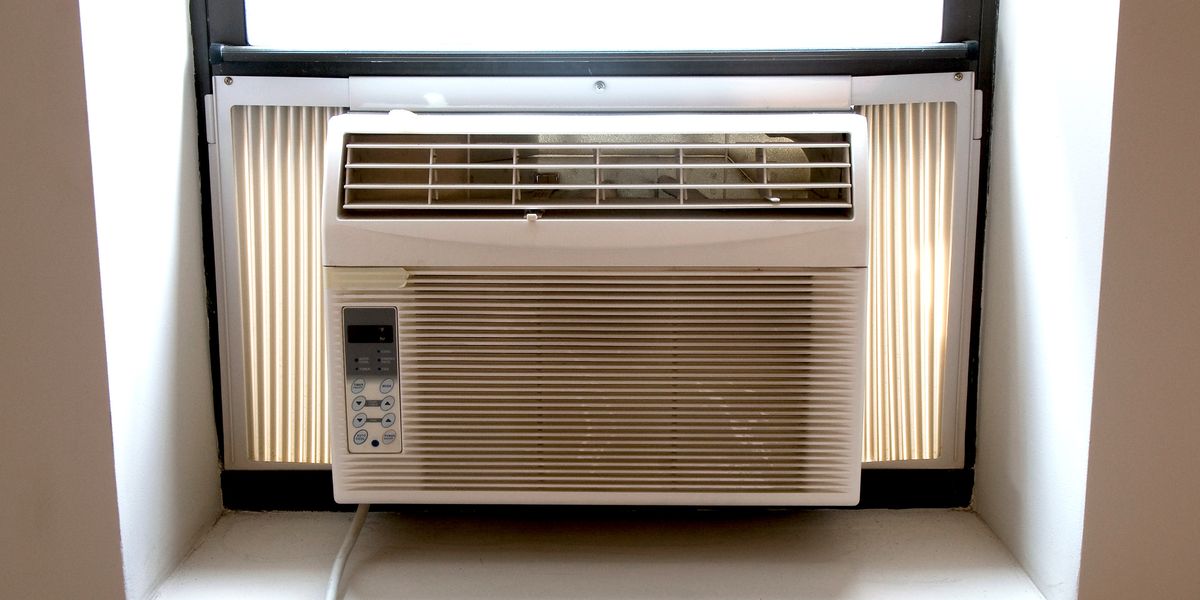
Lift the AC unit into the window so that the exhaust vents face outward. Use an electric drill and screws to secure the AC properly into place. If there’s a gap between the sides of the AC and the window frame, seal it off using styrofoam or another type of insulation. Some AC units come equipped with extendable sides to help close the gap. After it is secure and sealed off, plug it in and turn it on.
Call Your Friendly HVAC Technician If You Need Help
Entek HVAC has been helping Pacific Northwest residents to keep their homes’ heating and cooling systems working for over 75 years. Entek is known for its quality of service as well as the professionalism of its HVAC technicians. If you have questions about how to put an AC in the window or would like someone to do the heavy lifting for you, give us a call. For more information, visit our website.